
Today, We are going to Create a custom WordPress Plugin from scratch (2022). WordPress (WP, WordPress.org) is a free and open-source content management system (CMS) written in PHP and paired with a MySQL or MariaDB database.
Features include a plugin architecture and a template system, referred to within WordPress as Themes.
WordPress was originally created as a blog-publishing system but has evolved to support other web content types including more traditional mailing lists and forums, media galleries, membership sites, learning management systems (LMS) and online stores.
One of the most popular content management system solutions in use, WordPress is used by 42.8% of the top 10 million websites as of October 2021.
A WordPress plugin is a piece of software that “plugs into” your WordPress site. Plugins can add new functionality or extend existing functionality on your site, allowing you to create virtually any kind of website, from ecommerce stores to portfolios to directory sites.
Also Read : PHP Chunk File Upload using JavaScript
Steps to Create a custom WordPress Plugin from scratch (2022):
- Step 1: Plugin Directory Creation
- Step 2: Main Plugin File
- Step 3: Creating Function
- Step 4: Database Table Creation
- Step 5: Page view
- Step 6: Include view pages
- Step 7: Activate Plugin
- Step 8: Conclusion
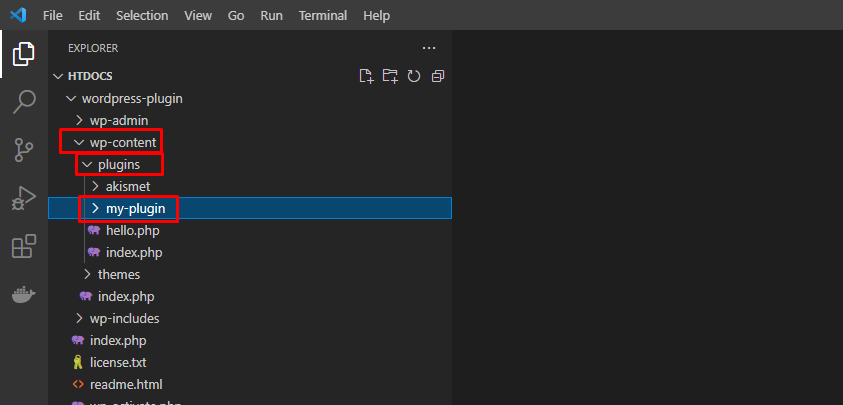
Plugin Directory Creation
Create a new directory inside wp-content/plugins with your plugin name we had called it my-plugin.
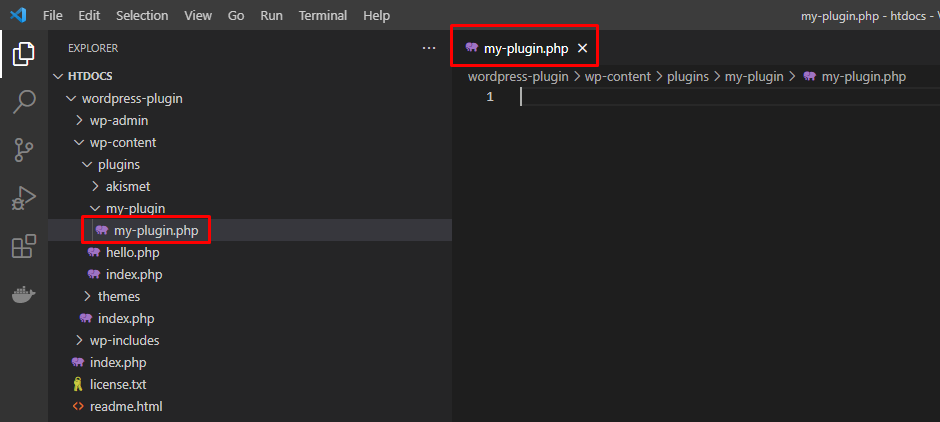
Main Plugin File
So, After creating a your plugin directory we will create a main plugin file.
We had called it my-plugin.php inside my-plugin directory.
So Now, We will add some code to make this plugin work add the following code to my-plugin.php file:
/**
 * Plugin Name: LaravelTuts Plugin
 * Plugin URI: https://laraveltuts.com
 * Description: LaravelTuts - Learning Laravel and Other Code Plugin.
 * Version: 1.0
 * Author: LaravelTuts
 * Author URI: https://laraveltuts.com
 * License: GPL2
 */
If your plugin use database then you have to use $wpdb:
global $wpdb;If you want to create some user defined functions, then create functions.php file and include it.
include "functions.php"; Declare the add_action() function : add_action() function Hooks a function on to a specific action.
//add_action( $tag, $function_to_add, $priority, $accepted_args );
add_action('admin_menu', 'myplugin_menu');
So now, Declare the function which you had create previously.
function myplugin_menu(){
}
Also Read : Install ReactJS in Laravel 9 Tutorial
Creating Function
Add the following code to the myplugin_menu() function file.
Declare the add_menu_page() function : add_menu_page() function creates a new top level menu section in the admin menu sidebar and registers a hook to callback your function for outputting the page content when the linked menu page is requested.
//add_menu_page( $page_title, $menu_title, $capability, $menu_slug, $function, $icon_url, $position );
add_menu_page(' My Plugin', ' My Plugin ', 'administrator', 'myplugin_settings', 'myplugin_ menu_page');
Declare the add_submenu_page() function : add_submenu_page() function add a sub menu page.
//add_submenu_page( $parent_slug, $page_title, $menu_title, $capability, $menu_slug, $function );
add_submenu_page('myplugin_settings', 'My Plugin Submenu', 'My Plugin Submenu', 'administrator', 'myproject_submenu', 'myproject_submenu_page');
Database Table Creation
function install_tables()
{
    global $wpdb;
    require_once(ABSPATH . 'wp-admin/includes/upgrade.php');
    $table1 = "CREATE TABLE ".$wpdb->prefix."table_name (
         `id` bigint(100) NOT NULL AUTO_INCREMENT,
         `name` varchar(255) NOT NULL,
         `email` varchar(255) NOT NULL,
         PRIMARY KEY  (`id`)
        ) ENGINE=InnoDB DEFAULT CHARSET=utf8 COLLATE=utf8_unicode_ci";
    dbDelta($table1);
}
Now declare the register_activation_hook() function and pass the previously declared function into register_activation_hook().
register_activation_hook(__FILE__,'instal_tables'); Also Read : How to send mail using Gmail in Laravel 9?
Page view
Now, Create a new directory inside your my-plugin folder with a name pages and create a file myplugin_menu_page_view.php inside the folder as shown in the image.
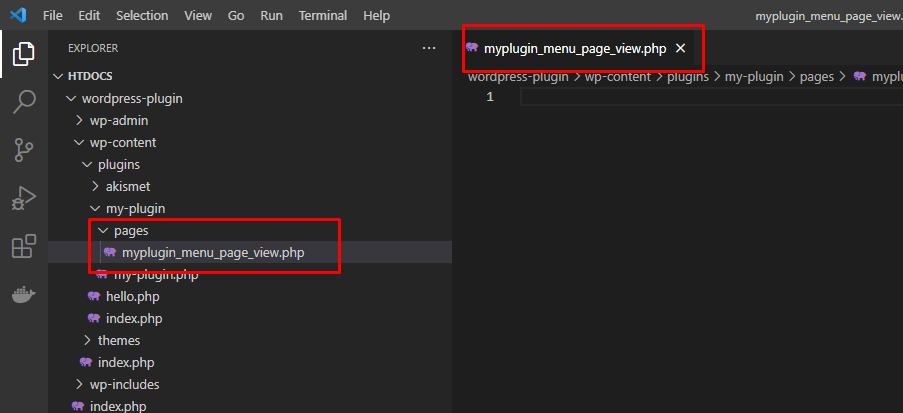
This myplugin_menu_page_view.php file contain menu or submenu page function.
Add the following code inside the file.
<?php
    ob_start();
    //admin menu page function
    function myplugin_menu_page()
    {
        //for db connection
        global $wpdb;
    ?>
        <!-- Page HTML goes here -->
        <h1>This is my LaravelTuts Plugin menu page</h1>
    <?php
    }
?>
Include view pages
Include all files which are contains the menu and submenu page functions.
include "pages/myplugin_menu_page_view.php";
include "pages/myplugin_submenu_page_view.php";
Activate Plugin
Once, Everything is done you can activate the plugin by visiting the plugin page. So, Go to WordPress backend > Plugins. There you will find plugin that we had created. So, just activate it!

Conclusion
We have been completed the custom WordPress Plugin creation tutorials. If you have any query about this tutorial and scripts, feel free to comment here.
Also Read : Create CRUD Application with Laravel and Vue.js