Today, We are going to learn how to Create CRUD Application with Laravel and Vue.js. So, Vue.js is an open-source model–view–view model front end JavaScript framework for building user interfaces and single-page applications. It was created by Evan You, and is maintained by him and the rest of the active core team members.
CRUD apps are the user interface that we use to interact with databases through APIs. It is a specific type of application that supports the four basic operations: Create, read, update, delete. Broadly, CRUD apps consist of the database, the user interface, and the APIs.
Also Read : Install ReactJS in Laravel 9 Tutorial
Steps to Create CRUD Application with Laravel and Vue.js
- Step 1: Installing Fresh new Laravel 9
- Step 2: Creating and Configuring Database
- Step 3: Installing NPM, Vue, Vue-Router and Vue-Axios
- Step 4: Creating Model, Controller and Migration
- Step 5: Defining Routes in web.php and api.php
- Step 6: Creating a Vue App
- Step 7: Creating Components
- Step 8: Defining Route in Vue Router
- Step 9: Include Vue.js Dependencies to app.js
- Step 10: Update webpack.mix.js
- Step 11: Run Development Server
- Step 12: Result
- Step 13: Conclusion
Installing Fresh new Laravel 9
So First, Install fresh new Laravel 9 Application. Enter the following code into terminal to install Laravel.
Installation Via Composer:
composer create-project laravel/laravel crud-tuts

cd crud-tuts

php artisan serve
Once you have started the Artisan development server, you may access your application at http://localhost:8000 or http://127.0.0.1:8000.
Creating and Configuring Database
So After Installing a Laravel Application. Now, We are going to create a database. First create a new database by visiting you phpmyadmin.

After, Creating a database Go to the project root directory, open .env file, and set database detail as follow:
DB_CONNECTION=mysql
DB_HOST=127.0.0.1
DB_PORT=3306
DB_DATABASE=<DATABASE NAME>
DB_USERNAME=<DATABASE USERNAME>
DB_PASSWORD=<DATABASE PASSWORD>
Installing NPM, Vue, Vue-Router and Vue-Axios
Now we are going to install frontend dependencies:
Installing NPM:
npm installNext, install vue, vue-router and vue-axios . Vue-axios will be used for calling Laravel backend API. Run the following command on the terminal:
npm install vue vue-router vue-axios --saveCreating Model, Controller and Migration
Create a Category model, migration, and controller. Run the following command for that:
php artisan make:model Category -mcr-mcr is use to create migration, controller and model in a single command.
Change Category Migration in database/migration :
public function up()
{
    Schema::create('categories', function (Blueprint $table) {
        $table->bigIncrements('id');
        $table->string('title');
        $table->text('description');
        $table->timestamps();
    });
}
Run the migration:
php artisan migrateNow, Open Category.php model from app/Models and update code into Category.php Model:
<?php

namespace App\Models;

use Illuminate\Database\Eloquent\Factories\HasFactory;
use Illuminate\Database\Eloquent\Model;

class Category extends Model
{
    use HasFactory;

    protected $fillable = ['title','description'];
}
Next, Open CategoryController.php and add code in index, store, update, and delete methods as a following:
<?php

namespace App\Http\Controllers;

use App\Models\Category;
use Illuminate\Http\Request;

class CategoryController extends Controller
{
    /**
     * Display a listing of the resource.
     *
     * @return \Illuminate\Http\Response
     */
    public function index()
    {
        $categories = Category::all(['id','title','description']);
        return response()->json($categories);
    }

    /**
     * Show the form for creating a new resource.
     *
     * @return \Illuminate\Http\Response
     */
    public function create()
    {
        //
    }

    /**
     * Store a newly created resource in storage.
     *
     * @param  \Illuminate\Http\Request  $request
     * @return \Illuminate\Http\Response
     */
    public function store(Request $request)
    {
        $category = Category::create($request->post());
        return response()->json([
            'message' => 'Category Created Successfully!!!',
            'category' => $category
        ]);
    }

    /**
     * Display the specified resource.
     *
     * @param  \App\Models\Category  $category
     * @return \Illuminate\Http\Response
     */
    public function show(Category $category)
    {
        return response()->json($category);
    }

    /**
     * Show the form for editing the specified resource.
     *
     * @param  \App\Models\Category  $category
     * @return \Illuminate\Http\Response
     */
    public function edit(Category $category)
    {
        //
    }

    /**
     * Update the specified resource in storage.
     *
     * @param  \Illuminate\Http\Request  $request
     * @param  \App\Models\Category  $category
     * @return \Illuminate\Http\Response
     */
    public function update(Request $request, Category $category)
    {
        $category->fill($request->post())->save();

        return response()->json([
            'message' => 'Category Updated Successfully!!!',
            'category' => $category
        ]);
    }

    /**
     * Remove the specified resource from storage.
     *
     * @param  \App\Models\Category  $category
     * @return \Illuminate\Http\Response
     */
    public function destroy(Category $category)
    {
        $category->delete();
        return response()->json([
            'message' => 'Category Deleted Successfully!!!'
        ]);
    }
}
Also Read : PHP Chunk File Upload using JavaScript
Defining Routes in web.php and api.php
Now we define routes for our application open web.php and api.php from routes folder and update the following code:
web.php
<?php

use Illuminate\Support\Facades\Route;

/*
|--------------------------------------------------------------------------
| Web Routes
|--------------------------------------------------------------------------
|
| Here is where you can register web routes for your application. These
| routes are loaded by the RouteServiceProvider within a group which
| contains the "web" middleware group. Now create something great!
|
*/

Route::get('{any}', function () {
    return view('app');
})->where('any','.*');
api.php
<?php

use Illuminate\Http\Request;
use Illuminate\Support\Facades\Route;
use App\Http\Controllers\CategoryController;
/*
|--------------------------------------------------------------------------
| API Routes
|--------------------------------------------------------------------------
|
| Here is where you can register API routes for your application. These
| routes are loaded by the RouteServiceProvider within a group which
| is assigned the "api" middleware group. Enjoy building your API!
|
*/

Route::middleware('api')->group(function () {
    Route::resource('category', CategoryController::class);
});
Creating a Vue App
In this step, go-to resource/views directory, create the app.blade.php file, and add the following code to app.blade.php as follow:
<!DOCTYPE html>
<html lang="en">
<head>
    <meta charset="UTF-8">
    <meta name="viewport" content="width=device-width, initial-scale=1.0">
    <meta http-equiv="X-UA-Compatible" content="ie=edge">
    <title>Laravel VUE CRUD Application - LaravelTuts</title>

    <link rel="preconnect" href="https://fonts.googleapis.com">
    <link rel="preconnect" href="https://fonts.gstatic.com" crossorigin>
    <link href="https://fonts.googleapis.com/css2?family=Nunito:wght@200;600&display=swap" rel="stylesheet">
    <link href="https://cdn.jsdelivr.net/npm/bootstrap@5.0.1/dist/css/bootstrap.min.css" rel="stylesheet" crossorigin="anonymous">
    <link rel="stylesheet" href="{{ mix('css/app.css')}}" type="text/css">
</head>
<body>
    <div id="app"></div>
    <script src="{{ mix('js/app.js') }}" type="text/javascript"></script>
</body>
</html>
Creating Components
So Now, we will create components for vue. Create new folder in resources/js and name it components. Now create the following files and folder in it:
- App.vue
- Welcome.vue
- Category/List.vue
- Category/Add.vue
- Category/Edit.vue
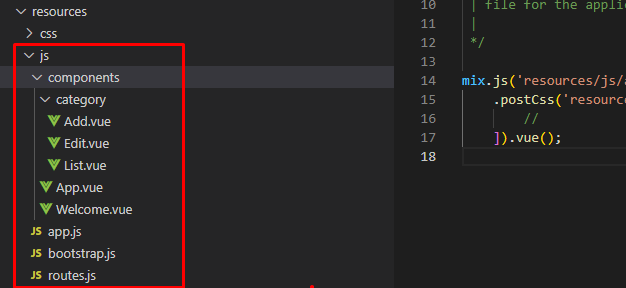
Category is a folder inside components folder.
App.vue is the main file of our Vue app. We will define router-view in that file. All the routes will be shown in App.vue file.
Now, Update the following code to the following files:
Welcome.vue
<template>
    <div class="container mt-5">
        <div class="col-12 text-center">
            <h1>LaravelTuts</h1>
            <a href="https://laraveltuts.com" target="_blank">Visit For More Tutorials</a>
        </div>
    </div>
</template>
App.vue
<template>
    <main>
        <nav class="navbar navbar-expand-lg navbar-dark bg-dark">
            <div class="container-fluid">
                <router-link to="/" class="navbar-brand" href="#">Laravel VUE CRUD Application - LaravelTuts</router-link>

                <div class="collapse navbar-collapse" id="navbarSupportedContent">
                    <ul class="navbar-nav mr-auto">
                        <li class="nav-item" exact-active-class="active">
                            <router-link to="/" class="nav-link">Home</router-link>
                        </li>
                        <li class="nav-item" exact-active-class="active">
                            <router-link to="/category" class=" nav-link">Category</router-link>
                        </li>
                    </ul>
                </div>
            </div>
        </nav>
        <div class="container mt-5">
            <router-view></router-view>
        </div>
    </main>
</template>

<script>
    export default {}
</script>
Category/List.vue
<template>
    <div class="row">
        <div class="col-12 mb-2 text-end">
            <router-link :to='{name:"categoryAdd"}' class="btn btn-primary">Create</router-link>
        </div>
        <div class="col-12">
            <div class="card">
                <div class="card-header">
                    <h4>Category</h4>
                </div>
                <div class="card-body">
                    <div class="table-responsive">
                        <table class="table table-bordered">
                            <thead>
                                <tr>
                                    <th>ID</th>
                                    <th>Title</th>
                                    <th>Description</th>
                                    <th>Actions</th>
                                </tr>
                            </thead>
                            <tbody v-if="categories.length > 0">
                                <tr v-for="(category,key) in categories" :key="key">
                                    <td>{{ category.id }}</td>
                                    <td>{{ category.title }}</td>
                                    <td>{{ category.description }}</td>
                                    <td>
                                        <router-link :to='{ name:"categoryEdit" , params:{ id:category.id } }' class="btn btn-success">Edit</router-link>
                                        <button type="button" @click="deleteCategory(category.id)" class="btn btn-danger">Delete</button>
                                    </td>
                                </tr>
                            </tbody>
                            <tbody v-else>
                                <tr>
                                    <td colspan="4" align="center">No Categories Found.</td>
                                </tr>
                            </tbody>
                        </table>
                    </div>
                </div>
            </div>
        </div>
    </div>
</template>

<script>
export default {
    name:"categories",
    data(){
        return{
            categories:[]
        }
    },
    mounted(){
        this.getCategories()
    },
    methods:{
        async getCategories(){
            await this.axios.get('/api/category').then(response=>{
                this.categories = response.data
            }).catch(error=>{
                console.log(error)
                this.categories = []
            })
        },
        deleteCategory(id){
            if(confirm("Are you sure to delete this category ?")){
                this.axios.delete('/api/category/'+id).then(response=>{
                    this.getCategories()
                }).catch(error=>{
                    console.log(error)
                })
            }
        }
    }
}
</script>
Also Read : How to Login with Google in PHP
Category/Add.vue
<template>
    <div class="row">
        <div class="col-12">
            <div class="card">
                <div class="card-header">
                    <h4>Add Category</h4>
                </div>
                <div class="card-body">
                    <form @submit.prevent="create">
                        <div class="row">
                            <div class="col-12 mb-2">
                                <div class="form-group">
                                    <label>Title</label>
                                    <input type="text" class="form-control" v-model="category.title">
                                </div>
                            </div>
                            <div class="col-12 mb-2">
                                <div class="form-group">
                                    <label>Description</label>
                                    <input type="text" class="form-control" v-model="category.description">
                                </div>
                            </div>
                            <div class="col-12 mb-2">
                                <button type="submit" class="btn btn-primary">Save</button>
                            </div>
                        </div>
                    </form>
                </div>
            </div>
        </div>
    </div>
</template>

<script>
export default{
    name:"add-category",
    data(){
        return{
            category:{
                title:"",
                description:""
            }
        }
    },
    methods:{
        async create(){
            await this.axios.post('/api/category', this.category).then(response=>{
                this.$router.push({name:"categoryList"})
            }).catch(error=>{
                console.log(error)
            })
        }
    }
}
</script>
Category/Edit.vue
<template>
    <div class="row">
        <div class="col-12">
            <div class="card">
                <div class="card-header">
                    <h4>Update Category</h4>
                </div>
                <div class="card-body">
                    <form @submit.prevent="update">
                        <div class="row">
                            <div class="col-12 mb-2">
                                <div class="form-group">
                                    <label>Title</label>
                                    <input type="text" class="form-control" v-model="category.title">
                                </div>
                            </div>
                            <div class="col-12 mb-2">
                                <div class="form-group">
                                    <label>Description</label>
                                    <input type="text" class="form-control" v-model="category.description">
                                </div>
                            </div>
                            <div class="col-12 mb-2">
                                <button type="submit" class="btn btn-primary">Update</button>
                            </div>
                        </div>
                    </form>
                </div>
            </div>
        </div>
    </div>
</template>

<script>
export default{
    name:"update-category",
    data(){
        return{
            category:{
                title:"",
                description:"",
                _method:"patch"
            }
        }
    },
    mounted(){
        this.showCategory()
    },
    methods:{
        async showCategory(){
            await this.axios.get('/api/category/'+this.$route.params.id).then(response=>{
                const { title, description} = response.data
                this.category.title = title
                this.category.description = description
            }).catch(error=>{
                console.log(error)
            })
        },
        async update(){
            await this.axios.post('/api/category/'+this.$route.params.id, this.category).then(response=>{
                this.$router.push({name:"categoryList"})
            }).catch(error=>{
                console.log(error)
            })
        }
    }
}
</script>
Also Read : How to Create a Login Form in PHP Example
Defining Route in Vue Router
So Now, We need to define Vue routes, so go to resource/js folder, create routes.js file and update the followings code into the file:
const Welcome = () => import('./components/Welcome.vue')
const CategoryList = () => import('./components/category/List.vue')
const CategoryCreate = () => import('./components/category/Add.vue')
const CategoryEdit = () => import('./components/category/Edit.vue')

export const routes = [
    {
        name: 'home',
        path: '/',
        component: Welcome
    },
    {
        name: 'categoryList',
        path: '/category',
        component: CategoryList
    },
    {
        name: 'categoryEdit',
        path: '/category/:id/edit',
        component: CategoryEdit
    },
    {
        name: 'categoryAdd',
        path: '/category/add',
        component: CategoryCreate
    }
]
Here we used lazy loading components. Vue JS handles loading components lazily with routes, so on the DOM, you can load components only when they are needed through routes.
Include Vue.js Dependencies to app.js
So Now, you need to add all routes, vue-axios, and other dependencies.
resource/js/app.js
import './bootstrap';

import vue from 'vue'
window.Vue = vue;

import App from './components/App.vue';
import VueRouter from 'vue-router';
import VueAxios from 'vue-axios';
import axios from 'axios';
import {routes} from './routes';

Vue.use(VueRouter);
Vue.use(VueAxios, axios);

const router = new VueRouter({
    mode: 'history',
    routes: routes
});

const app = new Vue({
    el: '#app',
    router: router,
    render: h => h(App),
});
Update webpack.mix.js
Update webpack.mix.js file in the root of the application.
const mix = require('laravel-mix');

/*
 |--------------------------------------------------------------------------
 | Mix Asset Management
 |--------------------------------------------------------------------------
 |
 | Mix provides a clean, fluent API for defining some Webpack build steps
 | for your Laravel applications. By default, we are compiling the CSS
 | file for the application as well as bundling up all the JS files.
 |
 */

mix.js('resources/js/app.js', 'public/js')
    .postCss('resources/css/app.css', 'public/css', [
        //
    ]).vue();
Run Development Server
So Now, Open terminal and run this command:
npm run watchBut Note: If this create error. Please install laravel-mix again, and run the command again.
npm install laravel-mix --save-dev //please use this command only npm run watch create errorStart Laravel’s local development server:
php artisan serveSo Now, Open http://localhost:8000 or http://127.0.0.1:8000 in the browser and test the application.
Result

Conclusion
So Today, We had learned how to Create CRUD Application with Laravel and Vue.js. Hope so this tutorial help you with your journey with learning Laravel. Please Note that we had use Vue 2 version for this tutorial. If you have any problem with this tutorial please comment you question below in the comment section so that we can solve you problems.
Also Read : How to send mail using Gmail in Laravel 9?