
Today we will learn about creating a login form in PHP Example. This Tutorial will cover creating a PHP file, CSS, JS and a configuration of the database. Login page should be as follows and works based on session. If the user closes the session, it will erase the session data.
Also Read: Laravel 9 Sorting Columns with Pagination
Step to Create a Login Form in PHP Example:
- Step 1: Project Structures
- Step 2: Create a PHP File
- Step 3: Create Database Config File
- Step 4: Create CSS
- Step 5: Create JS
- Step 6: Results
- Step 7: Conclusion
Project Structures
This is the project structures:
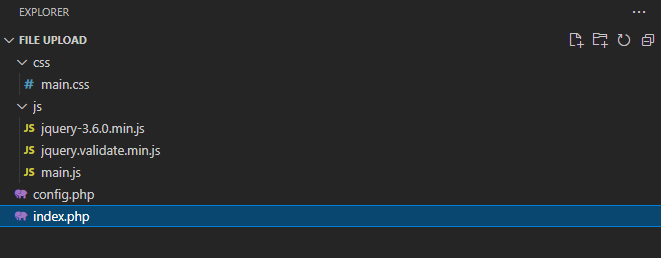
We have index.php, config.php at a root of the directory. There are two folder css and js which contain main.css, main.js and our jQuery files.
- index.php – going to be our main PHP file to display a login form
- config.php – going to be our database configuration file where we’ll add all database details like server, database name, database username and database password.
- main.css – This is going to be our stylesheet for styling the form.
- main.js – This contain the script of the project.
- jQuery Files – The one is the main jQuery file and the other is for validation.
Also Read : Autocomplete Search using jQuery UI in Laravel 9
Create a PHP File:
First, create an index.php in the project folder and add the following code into it:
<?php

session_name('LoginForm');
@session_start();

error_reporting(0);
include("config.php");

?>
<!DOCTYPE html>
<html>
<head>
    <meta charset="utf-8">
    <meta http-equiv="X-UA-Compatible" content="IE=edge">
    <title>Login Form - LaravelTuts</title>
    <meta name="description" content="">
    <meta name="viewport" content="width=device-width, initial-scale=1">
    <script src="js/jquery-3.6.0.min.js"></script>
    <link href="//netdna.bootstrapcdn.com/bootstrap/3.0.0/css/bootstrap.min.css" rel="stylesheet" id="bootstrap-css">
    <script src="//netdna.bootstrapcdn.com/bootstrap/3.0.0/js/bootstrap.min.js"></script>
    <script src="//cdnjs.cloudflare.com/ajax/libs/jquery-validate/1.19.2/jquery.validate.min.js"></script>
    <link rel="stylesheet" href="css/main.css">
    <script src="js/main.js"></script>
</head>
<body>

<div class="wrapper">
    <div class="container">
        <h1>Welcome to LaravelTuts</h1>
        <?php
        // check if user is logged
        $error = '';
        if (isset($_POST['is_login'])) {
            $sql = "SELECT * FROM " . $SETTINGS["USERS"] . " WHERE `email` = '" . $mysqli->real_escape_string($_POST['email']) . "' AND `password` = '" . $mysqli->real_escape_string($_POST['password']) . "'";
            if ($result = $mysqli->query($sql)) {

                $user = $result->fetch_assoc();
                $result->free();
                if (!empty($user)) {
                    $_SESSION['user_info'] = $user;
                    $sql = " UPDATE " . $SETTINGS["USERS"] . " SET last_login = NOW() WHERE id=" . $user['id'];
                    if (!$mysqli->query($sql)) {
                        printf("Error: %s\n", $mysqli->sqlstate);
                        exit;
                    }
                } else {
                    $error = 'Wrong email or password.';
                }
            } else {
                printf("Error: %s\n", $mysqli->sqlstate);
                exit;
            }
        }

        // action when logout is pressed
        if (isset($_GET['ac']) && $_GET['ac'] == 'logout') {
            $_SESSION['user_info'] = null;
            unset($_SESSION['user_info']);
        }
        if ($error !==''){
            ?><div class="alert alert-danger">
                <strong>Error</strong> <?php echo $error; ?>
            </div>
            <?php
        }
        ?>
        <?php
        // logged in info
        if (isset($_SESSION['user_info']) && is_array($_SESSION['user_info'])) { ?>

            <form id="login-form" class="login-form" name="form1">

                <div id="form-content">
                    <div class="welcome">
                        <span><?php echo $_SESSION['user_info']['name'] ?></span>, you are logged in.
                        <br/><br/>
                        <?php echo $_SESSION['user_info']['content'] ?>
                        <br/><br/>
                        <a class="logoutBtn" href="index.php?ac=logout" >Logout</a>
                    </div>
                </div>

            </form>

        <?php } else {
            //login form
            ?>
            <form id="login-form" class="login-form" name="form1" method="post" action="index.php">
                <input type="hidden" name="is_login" value="1">
                <input id="email" name="email" class="required" type="email" placeholder="Email">
                <input id="password" name="password" class="required" type="password" placeholder="Password">
                <div class="row"><button type="submit" id="login-button">Login</button></div>

            </form>
        <?php } ?>
    </div>
</div>
</body>
</html>
Also Read : How to create Custom Laravel Helpers in Laravel 9
Create Database Config File:
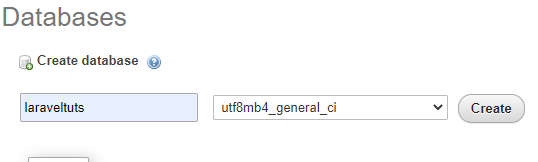
First create a database:
Go to PHPMYADMIN and create a new database for the project. We had name a database as laraveltuts for this project.
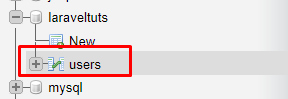
Create a table with Fields:
As now you had created a database now its time to create a users table. Create a new table users in laraveltuts database.
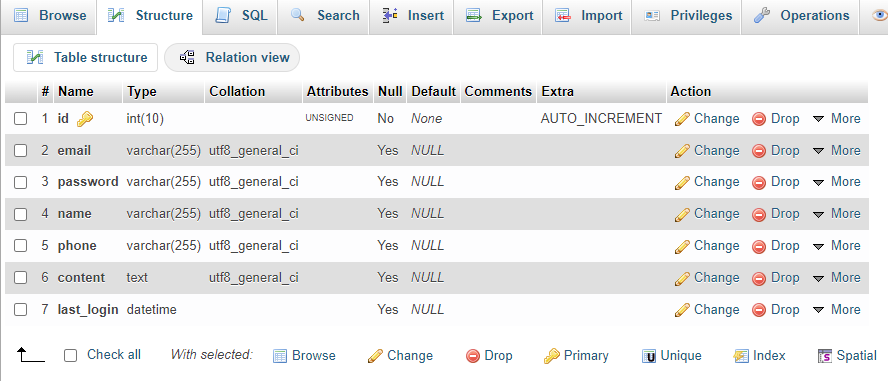
After you create table add column as shown in the image:
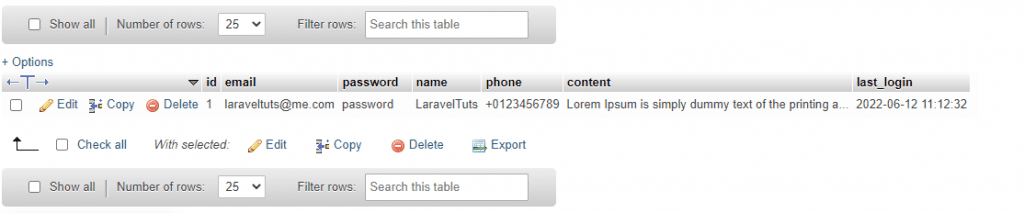
Add User details to table:
Now it’s time to insert users into it. We had inserted a new record to the table.
Create a config.php file in the root directory of the project and add the following code:
<?php

/* Define MySQL connection details and database table name */
$SETTINGS["mysql_user"]='root';
$SETTINGS["mysql_pass"]='';
$SETTINGS["hostname"]='localhost';
$SETTINGS["mysql_database"]='laraveltuts';
$SETTINGS["USERS"] = 'users'; // this is the default table name that we used

/* Connect to MySQL */
$mysqli = new mysqli($SETTINGS["hostname"], $SETTINGS["mysql_user"], $SETTINGS["mysql_pass"],$SETTINGS["mysql_database"]);
/* check connection */
if (mysqli_connect_errno()) {
    printf("Connect failed: %s\n", mysqli_connect_error());
    exit();
}
Add the MySql Username, Password, Hostname and Table name.
Also Read : How to Send Email using PHPMailer in Laravel 9
Create CSS:
We had added bootstrap CDN. You can get a CDN visit bootstrap website.
Add the following style to css/main.css file.
@import url(https://fonts.googleapis.com/css?family=Source+Sans+Pro:200,300);
* {
  box-sizing: border-box;
  margin: 0;
  padding: 0;
  font-weight: 300;
}
body {
  font-family: 'Source Sans Pro', sans-serif;
  color: white;
  font-weight: 300;
}
body ::-webkit-input-placeholder {
  /* WebKit browsers */
  font-family: 'Source Sans Pro', sans-serif;
  color: white;
  font-weight: 300;
}
body :-moz-placeholder {
  /* Mozilla Firefox 4 to 18 */
  font-family: 'Source Sans Pro', sans-serif;
  color: white;
  opacity: 1;
  font-weight: 300;
}
body ::-moz-placeholder {
  /* Mozilla Firefox 19+ */
  font-family: 'Source Sans Pro', sans-serif;
  color: white;
  opacity: 1;
  font-weight: 300;
}
body :-ms-input-placeholder {
  /* Internet Explorer 10+ */
  font-family: 'Source Sans Pro', sans-serif;
  color: white;
  font-weight: 300;
}
.wrapper {
  background: #50a3a2;
  background: -webkit-linear-gradient(top left, #50a3a2 0%, #53e3a6 100%);
  background: linear-gradient(to bottom right, #50a3a2 0%, #53e3a6 100%);
  width: 100%;
  height: 100vh;
  overflow: hidden;
}
.wrapper.form-success .container h1 {
  -webkit-transform: translateY(85px);
          transform: translateY(85px);
}
.container {
  max-width: 600px;
  margin: 0 auto;
  padding: 80px 0;
  height: 400px;
  text-align: center;
}
.container h1 {
  color: #f9f800;
  -webkit-transition-duration: 1s;
          transition-duration: 1s;
  -webkit-transition-timing-function: ease-in-put;
          transition-timing-function: ease-in-put;
  font-weight: bold;
  letter-spacing: 3px;
  font-size: 30px;
  text-transform: uppercase;
}
form {
  padding: 20px 0;
  position: relative;
  z-index: 2;
}
form input {
  -webkit-appearance: none;
    -moz-appearance: none;
          appearance: none;
  outline: 0;
  border: 1px solid rgba(255, 255, 255, 0.4);
  background-color: rgba(255, 255, 255, 0.2);
  width: 300px;
  border-radius: 3px;
  padding: 10px 15px;
  margin: 0 auto 10px auto;
  display: block;
  font-size: 18px;
  color: white;
  -webkit-transition-duration: 0.25s;
          transition-duration: 0.25s;
  font-weight: 300;
}
form input:hover {
  background-color: rgba(255, 255, 255, 0.4);
}
form input:focus {
  background-color: white;
  color: #53e3a6;
}
form button {
  -webkit-appearance: none;
    -moz-appearance: none;
          appearance: none;
  outline: 0;
  background-color: white;
  border: 0;
  padding: 10px 15px;
  color: #000;
  border-radius: 3px;
  width: 300px;
  cursor: pointer;
  font-size: 18px;
  -webkit-transition-duration: 0.25s;
          transition-duration: 0.25s;
}
.logoutBtn{
  color: white;
  padding: 5px 10px;
  background: black;
  border-radius: 5px;
  text-decoration: none;
  text-transform: uppercase;
  font-size: 14px;
  font-weight: bold;
  letter-spacing: 3px;
}
.logoutBtn:hover, .logoutBtn:focus{
  color: #f9f800;
  text-decoration: none;
  text-transform: uppercase;
}
.welcome{
  font-size: 17px;
}
.welcome span{
  font-size: 17px;
  font-weight: bold;
  color: #f9f800;
}
form button:hover {
  background-color: #f5f7f9;
}
Create JS:
Download the jQuery and jQuery Validation and add it to js folder.
Add the following style to js/main.js file.
var jQuery_1_8_2 = $.noConflict();
(function ($, undefined) {
	$(function () {
		var form = $('#login-form');

		if (form.length > 0) {
			form.validate({
			});
		}

	});
})(jQuery_1_8_2);
Results:

Conclusion:
Today we had learned how to create a login form in PHP example. If you like the tutorial or have any trouble, please comment below.
Also Read : Fetch records from MySQL with jQuery AJAX – Laravel 9